Selenium IDE Installation Part 1 (Chrome)
Good news for Chrome users, selenium has launched IDE plugin for the Chrome browser also. Previously it is only for the firefox plugin.
Selenium IDE is an extension plugin which works on recording and playing back tests on Firefox and Chrome and also saving and loading scripts, for later playback. You can find the latest version of selenium HQ website or download this from firefox extensions market. With the help of this IDE, you can generate quick test case or test suites easily and also export the selenese script on various language bindings.
Copy the URL and paste it into the browser
https://www.seleniumhq.org/download/
Scroll the page and search for the section of Selenium IDE. Here you can find the latest and previous versions of Selenium IDE. Below is the step by step screenshots I have attached for your knowledge point of view. (View the image 1)
When you select the option for chrome(or Firefox), an extension addition page is opened (View the Image 2).
When IDE is not installed on chrome or firefox browser it looks like below format. (View the image 3)
Finally, click the button ADD TO CHROME and installation gets started. After successful installation, you need to verify whether the plugin installed or not. Follow the below step to launch the Selenium IDE first time on your machine (browser).
Click the selenium Icon it will be launched the IDE if this icon is not visible on to the browser follow the below steps.
For Chrome :
Step 1: Click the three dotted icons on the right side of the browser
Step2: Popup menu is opened click the
The same steps followed for the Firefox browser also. The later blog post explains how to use Selenium IDE to record and generate test script fast and easy way.
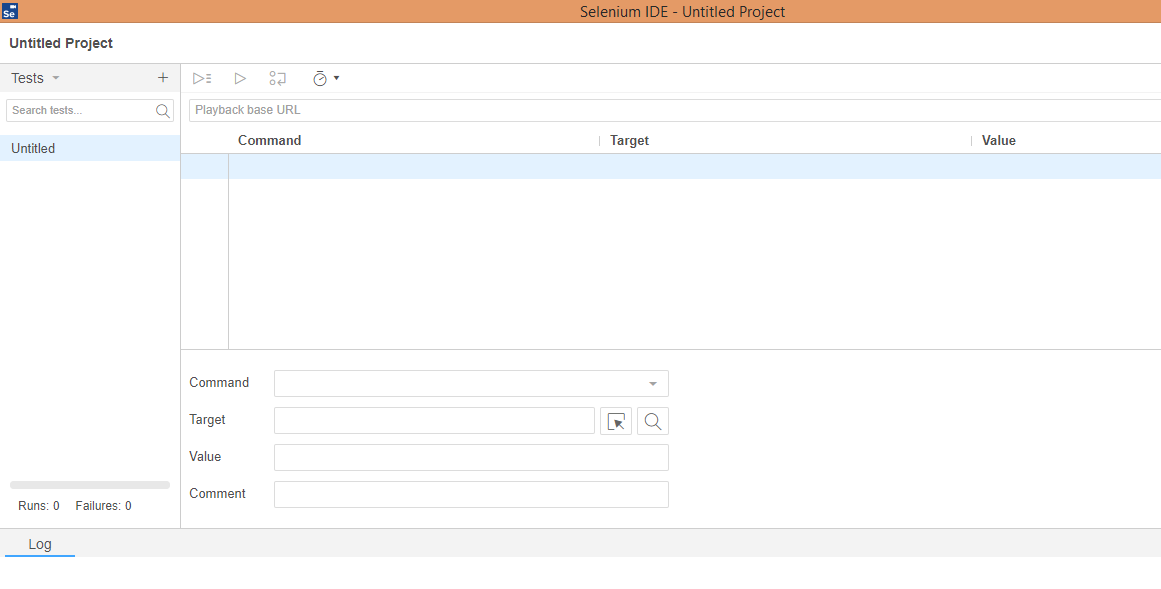
Final Selenium IDE UI looks like (View the image 4)
Fig.2
Fig.3
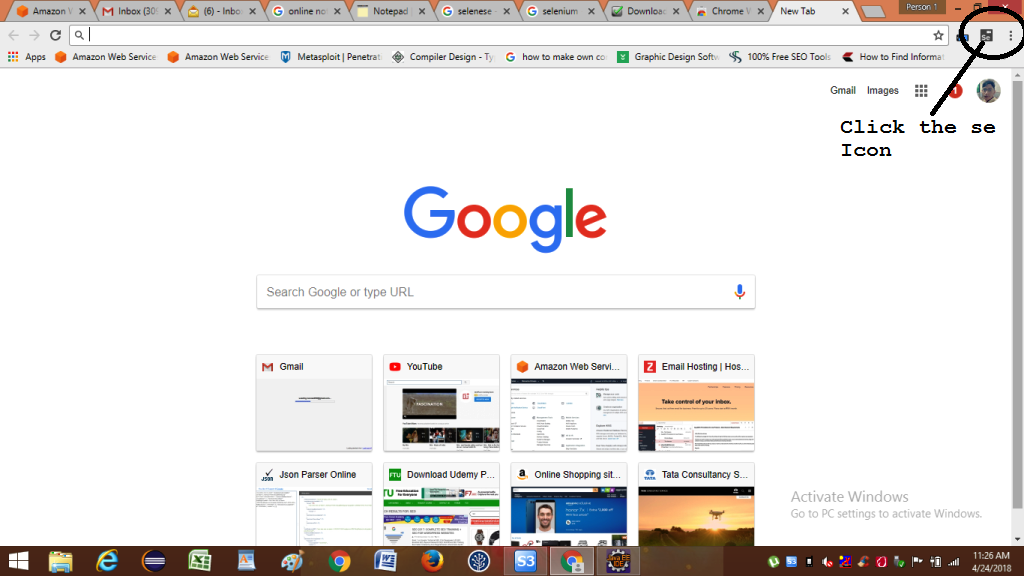
Fig.4